Put a Safety Net in Azure
Let me tell you a funny story. Once upon a time, I was playing in my own Azure tenant that I setup using my credit card. I decided that I would play with Azure Fabric and I found all kinds of things on the internet that I could deploy with it. After a few hours of playing, I looked over at the Cost Analysis pane to see what the cost would be if I were to just leave it. It said over $16,000/per month. I was shocked to say the least. Knowing that I would just delete the resource groups and carry on, I decided to kick off a terraform script that added an additional 350 D-series virtual machines, along with load balancers and virtual networks. This was taking a while so while waiting for these to provision, I decided to watch a little TV and fell asleep. The next morning I did not remember to check on it. It wasn’t until the following night that I remembered. Before I go forward, lets do a little math. If you devide $16k by 31 days in a month you will come up with about $516 per day. This is how much my little nap was about to cost me, but it didn’t. It cost me $.01. Let me show you what to do so that you also can limit the damage done when you forget to remove resources. We are going to create an Azure Function with Powershell that will clear out all of your resource groups in Azure every night at midnight.
We will do this with a mix of Powershell and portal, just because we can.
The first thing you will want to do is to create a Resource Group in your tenant. I called mine AzureCleanUp. You can call yours whatever you would like. This resource group will be the only thing that lives beyond midnight every night
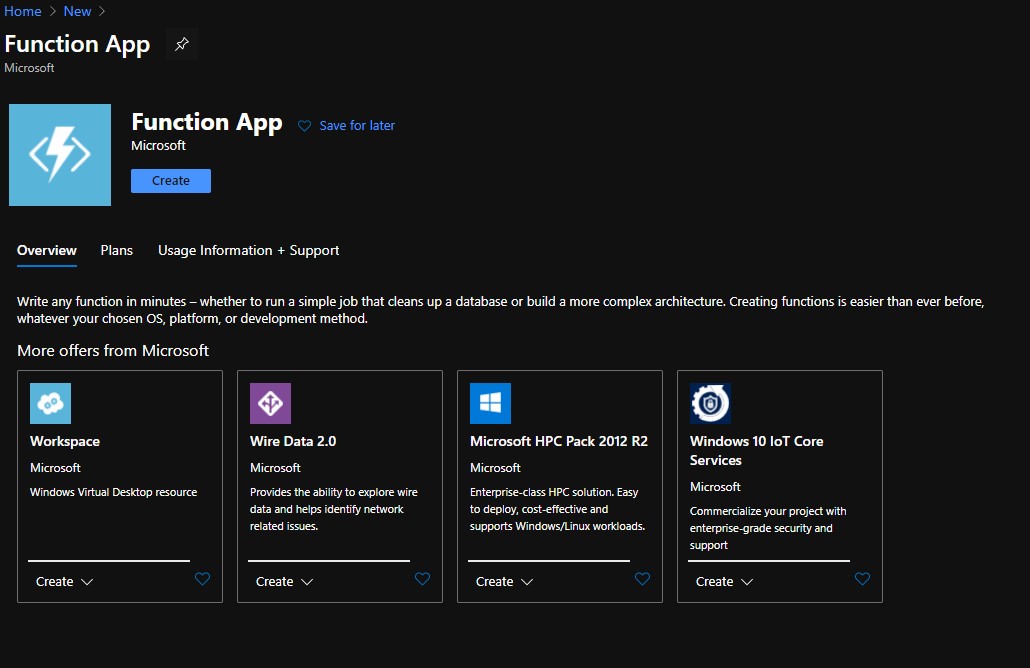
new-azresourcegroup -resourcegroupname AzureCleanUp -location eastusNow that you have your resource group to play in. Go to the portal and click the icon to Create a Resource. Type in Function App in the search bar and hit Enter.
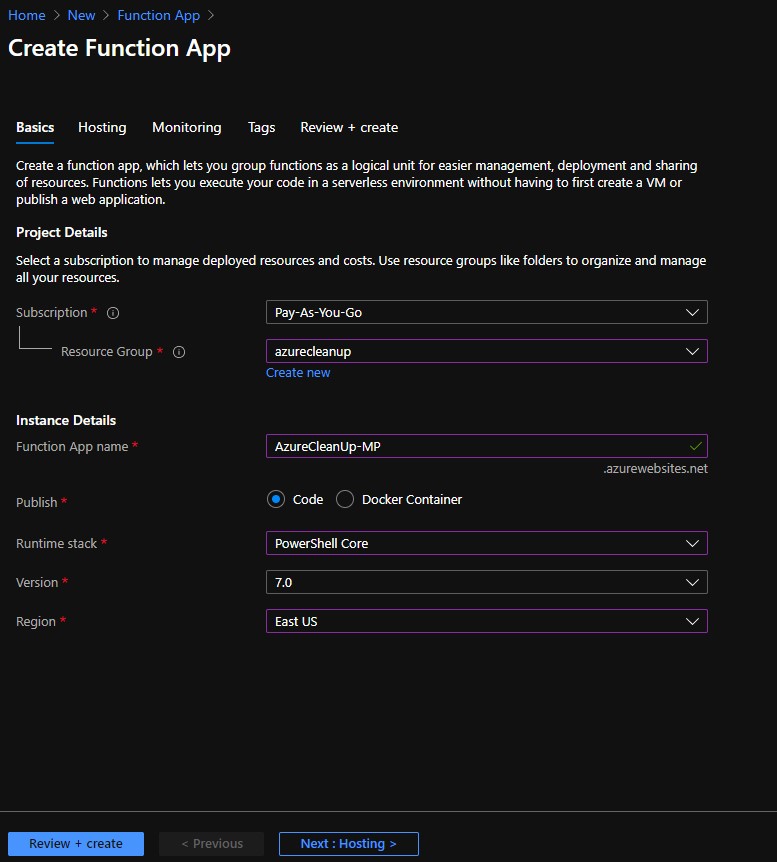
Click Create on the New Function App windows and it then takes you through the Wizard to create your function app. Choose your Resource Group that you just created. Create a name for your function app and it has to be unique due to the public address. Choose to publish it as code with the Powershell Core runtime.
On the Hosting page you can choose different things if you would like or you can just leave the defaults.

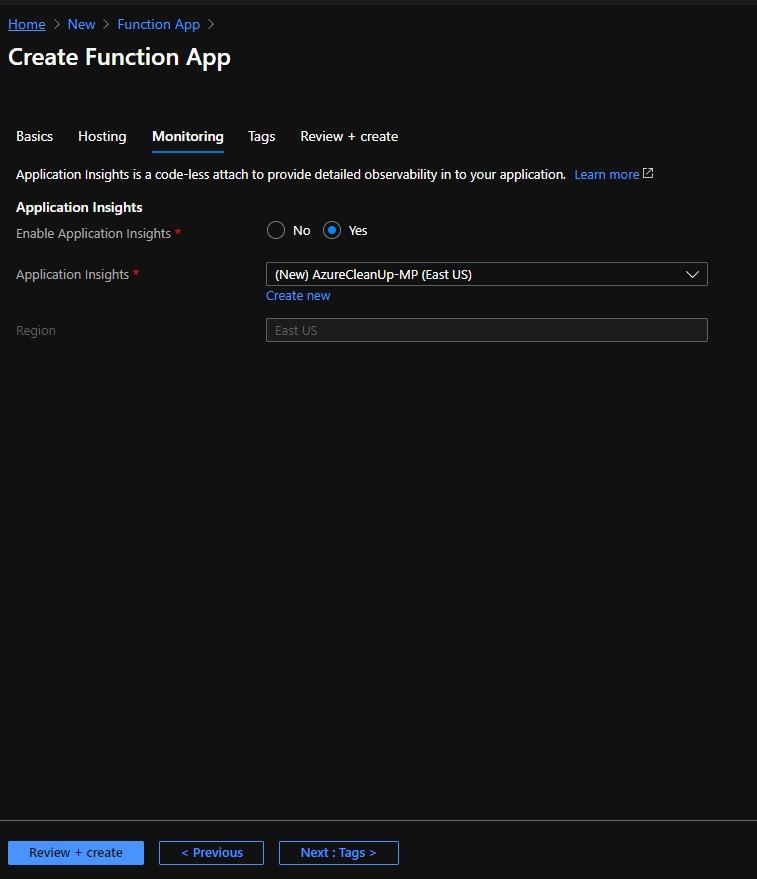
Go on to the Monitoring tab and again you can choose whatever you want.
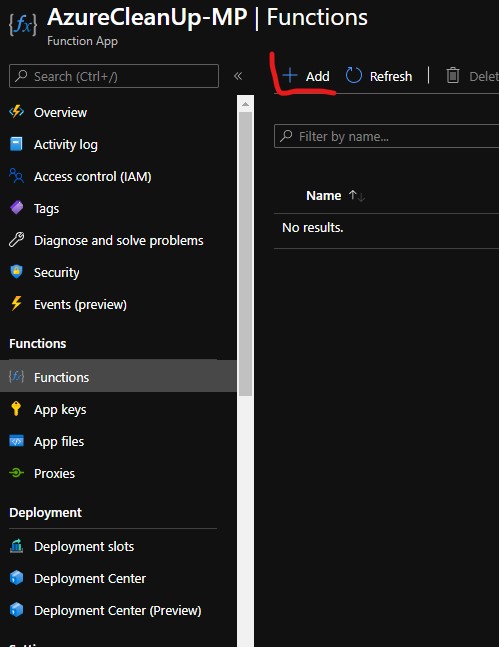
You can skip through the tag or fill one out and then go on to Review and Create. Once you get a positive review, go ahead and hit create. It may take about 5 minutes to complete and once it does go to Functions on the left and click Add to add a new function.
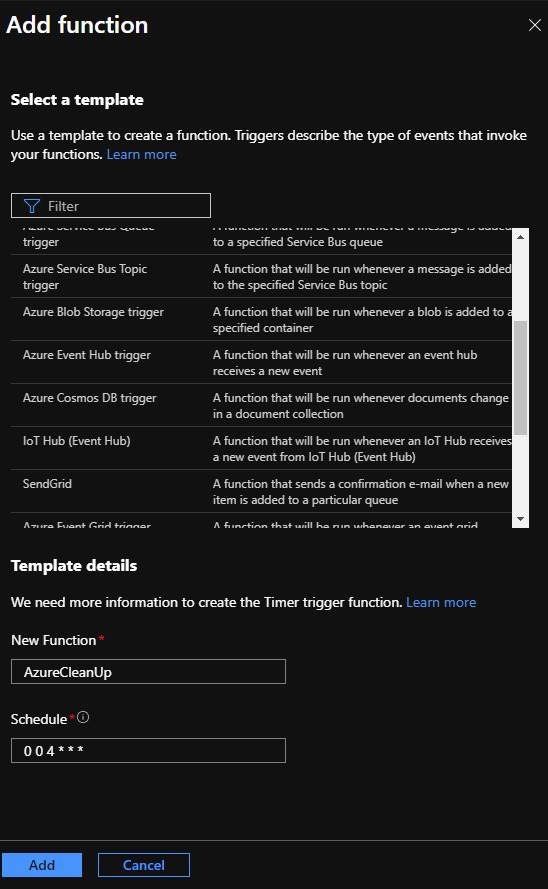
A new blade will pop out on the right. Select a Timer Trigger function and change the field for New Function to your function name and set the Schedule field. Mine is “0 0 4 * * *” because this represents midnight for me. Then click Add.
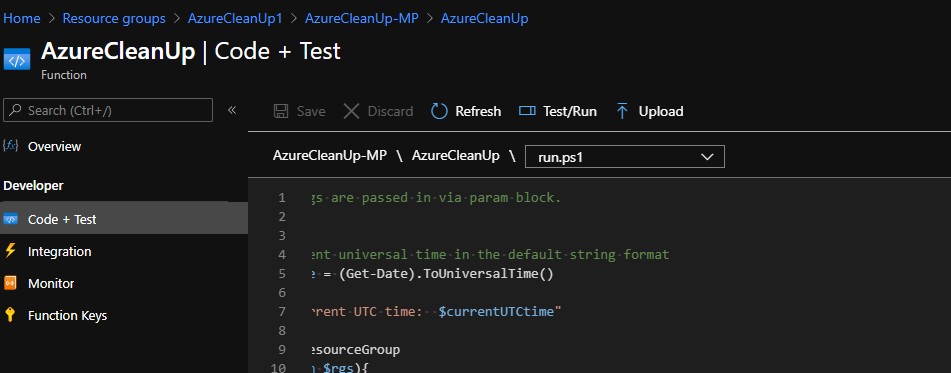
Next click on Code + Test and you will finally see the Powershell code inside of the function. Go ahead and replace it with the Powershell code below and replace the xxxxxxxx-xxxx-xxxx-xxxx-xxxxxxxxxxxx with your subscription ID. You can get this from the properies of the Resource Group. When done pasting click Save.
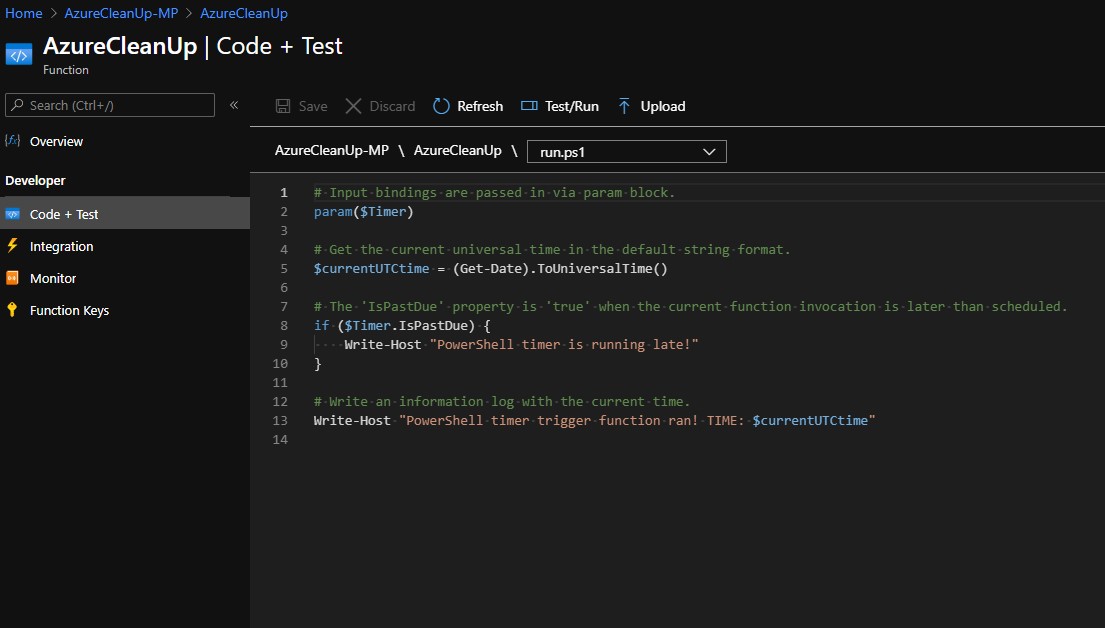
# Input bindings are passed in via param block.
param($Timer)
# Get the current universal time in the default string format
$currentUTCtime = (Get-Date).ToUniversalTime()
Write-Host "Current UTC time: $currentUTCtime"
$rgs = Get-AzResourceGroup
foreach ($rg in $rgs){
if ($rg.ResourceId -ne '/subscriptions/xxxxxxxx-xxxx-xxxx-xxxx-xxxxxxxxxxxx/resourceGroups/azurecleanup'){
Remove-AzResourceGroup -Name $rg.ResourceGroupName -Force
}
}
# Write an information log with the current time.
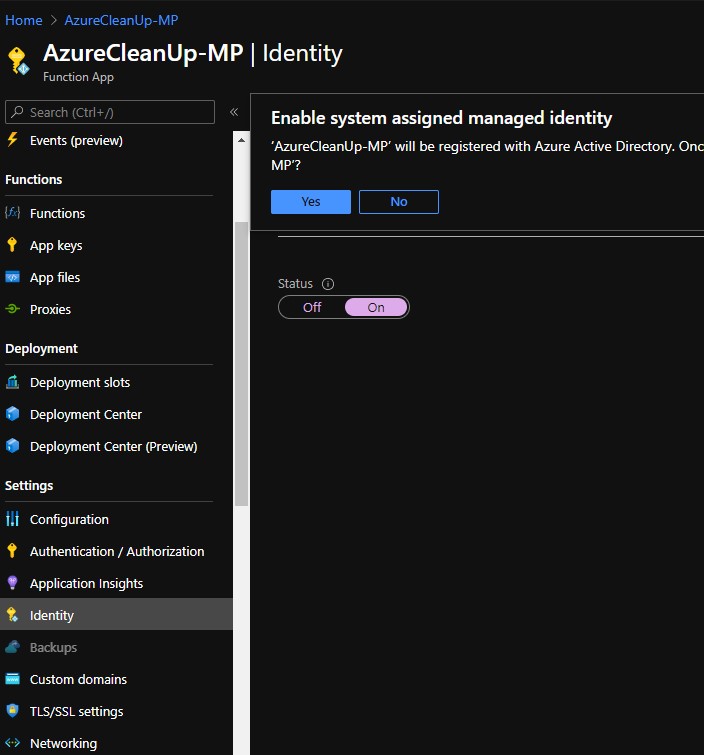
Write-Host "PowerShell timer trigger function ran! TIME: $currentUTCtime"Now go back two menus to where you first clicked Functions and find Identity. Go ahead and change the bar to On and click Save.
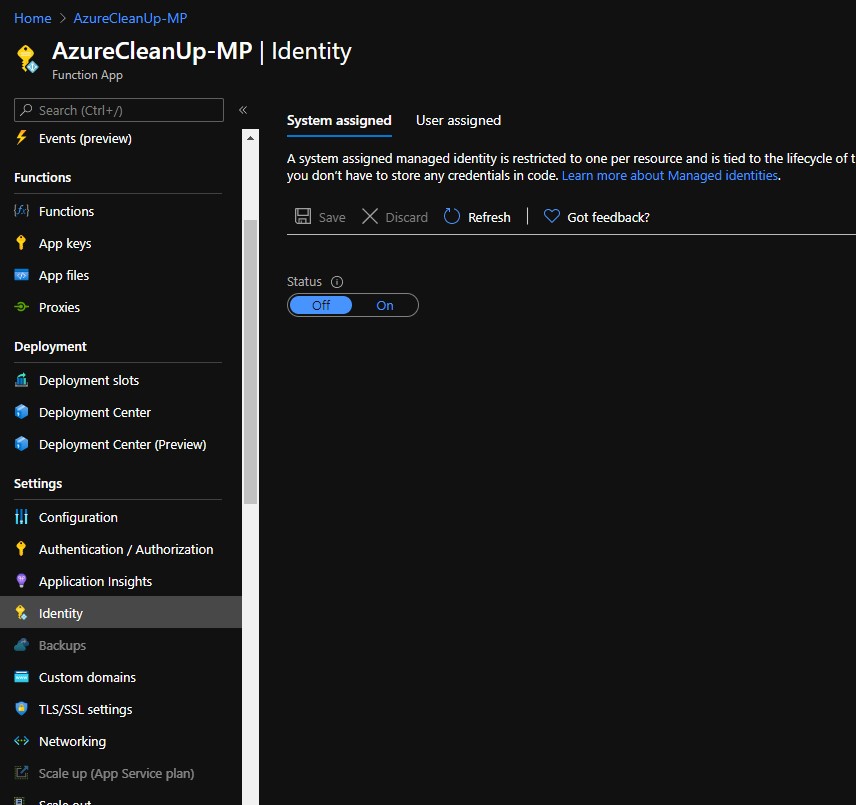
You will be asked if this is something that you want to do and select Yes.
Once it completes, click on Role Assignments and it will take you to a new page. Select Add Role Assignment at the top.
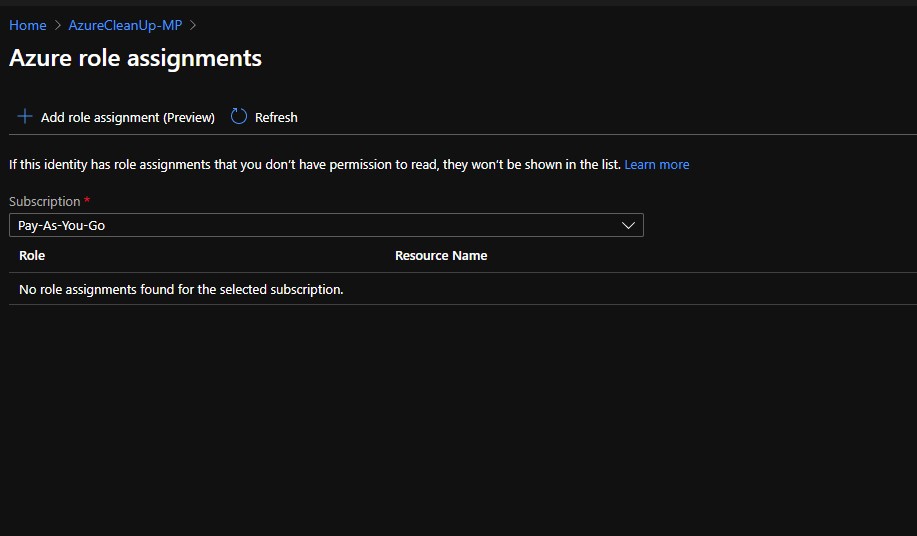
A new blade will pop out on the right. Select Subscription in the scope and Contributor as the role. This will be necessary as you will be removing Resource Groups with it. Click Save.
At this point, you should be all done.
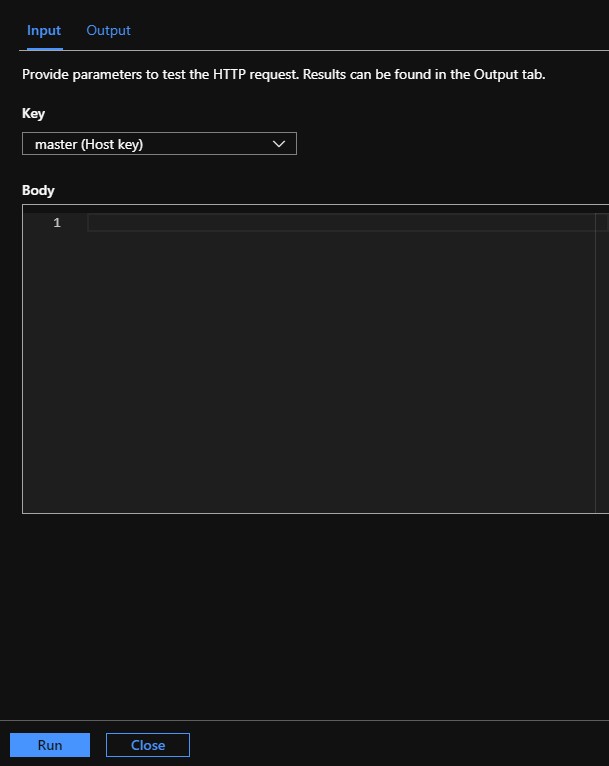
Now we will want to test it. Create a dummy Resource Group in your tenant. Then, let’s go back to the Code + Test screen inside the Function App. Click on Test/Run at the top
Now click Run in the blade that pops up to the right.
If you have set it up correctly you should see the test Resource Groups disappear. This may take a few minutes as it takes time to remove a Resource Group. My suggestion is to then test the trigger. Build out a new Resource Group and place a virtual machine with a virtual network inside. Come back the next day to validate that it is gone. If it is then you now know that every night at midnight your subscription will be cleaned.
Thanks Carlos