
Setting Up Azure Bastion
Ok so here we go! Today we are talking about setting up Azure Bastion. In case you are unaware of what Azure Bastion is, it is an Azure service that allows you to connect to your virtual machines in Azure without having to open up ports on your firewalls for RDP or SSH. There are nefarious characters out there everywhere who are constantly scanning every IP looking for someone who has left these ports open so don’t use them. If you think that you will be smart and just use a different port and then use your Network Security Group to map your port to 3389 then please think again. Scanners such as NMAP can not only find every port open but you can easily test each port with each protocol to see if the port accepts that protocol. So no bueno!
Azure Bastion is free for the first 5GB per month and in our case, it is not likely that we will use all of that. If you would like more information on pricing, you can find it here on the pricing page.
Now to begin, the first thing that you will want to do is go to your virtual network and create a new subnet. You do not have to do anything pretty but you do have to name the subnet AzureBastionSubnet. You can select any IP range in your virtual network’s address space as long as it is at least a /27. If your address space is 10.1.0.0/16 then you can use something like 10.1.254.0/24 as long as that does not overlap with another subnet.
Once the AzureBastionSubnet has been created in your virtual network then you will want to search for Bastions and select create new.
Filling out the form is quite straight forward with only a few things to input.
- Fill out your Resource Group
- Create a name for it
- Select a region
- Select your virtual network
- Select your AzureBastionSubnet
- Provide a name for your public IP
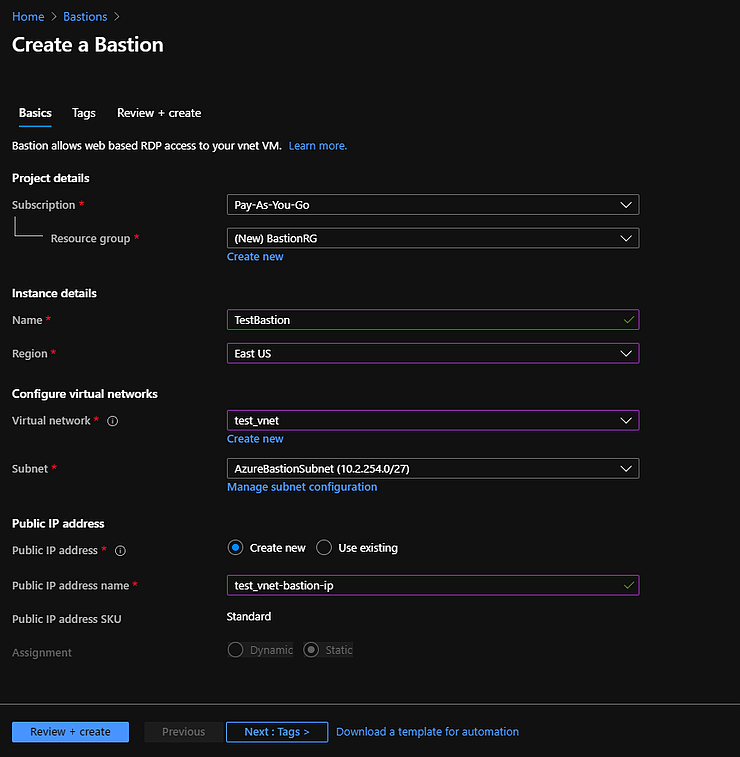
You can then go on to Tags or go ahead and hit Review + Create
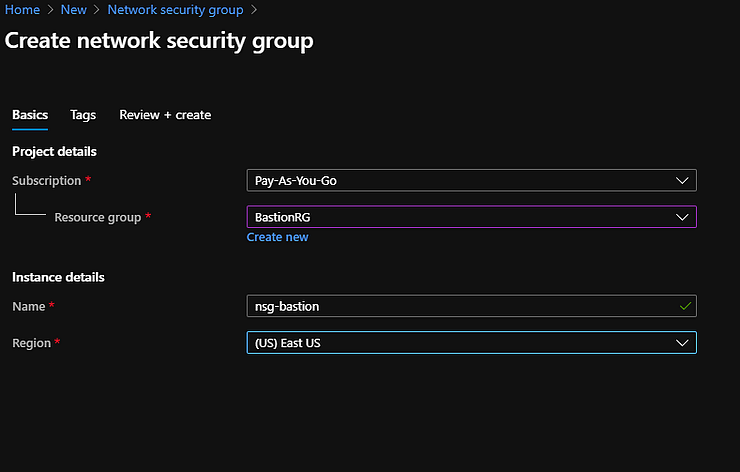
After the installation of Bastion has completed you will then want to create a Network Security Group to lock down the service. Go to the hamburger in the top left and select Create a Resource.
In the Search the Marketplace field type in Network Security Group and then hit Create on the next window.
Fill in the areas with your information
- Select your Resource Group
- Provide a name for your NSG
- Select your region
Then hit Review + Create
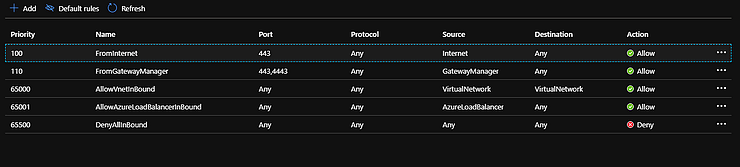
Once the NSG has been created we will add two inbound rules and two outbound rules. Go to the resource and on the left select Inbound Security Rules. Then add these two inbound rules
Then go to the left again and select Outbound Security Rules and add these two rules.
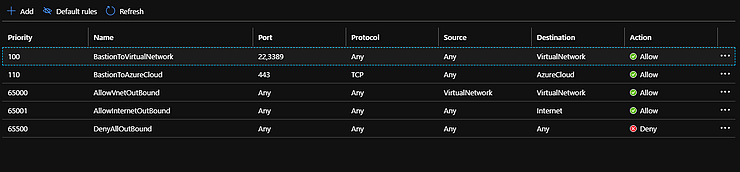
Now you click on Subnets on the left and click Associate to add the AzureBastionSubnet to the NSG.
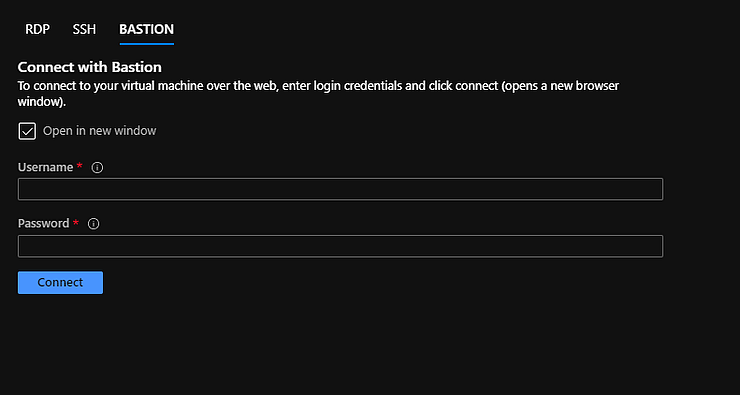
Now when you go back to your virtual machine and click Connect you will want to select Bastion. Type in your username and password to the virtual machine and you should connect right up.
I hope that this helps! Add a comment if it helps you or if you have difficulties getting it to work.